Here's the short answer: an under-desk cable tray, a roll of velcro ties, a neoprene cable sleeve, a pack of adhesive cable clips, and a cable box. Total cost: about $75. Total time to install: about 45 minutes. The result: a desk that looks like it belongs in a design magazine instead of a dorm room.
Now let me explain each one, because the order matters and so does the specific product.
Why Cable Management Is the Highest-Return Upgrade on Any Desk
You can spend $1,500 on a monitor and $500 on a chair, and if there's a black snake of cables running from your desk to the floor, the whole setup still looks cheap.
This is not an aesthetic complaint. It's a functional one. Visible cables collect dust. They tangle. They get pulled. They make it hard to move your desk, hard to clean under it, and hard to tell which cable is which when something stops working.
I've set up a lot of desks. The difference between a desk that feels expensive and a desk that feels temporary is almost never the furniture. It's whether you can see the cables.
Here are the five things I buy, in the order I install them.
One: An Under-Desk Cable Tray
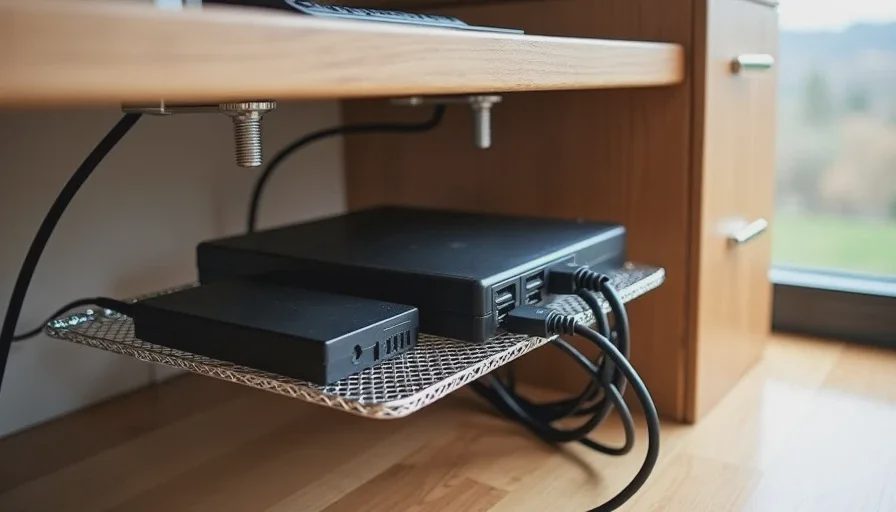
IKEA Signum, $25.
This is the foundation. It's a metal basket that screws to the underside of your desk and holds everything: the power strip, the laptop charger, the monitor's power brick, the extra cables you're not using right now.
The point is that nothing touches the floor. Not the power strip, not the bricks, not the coiled-up Ethernet cable you keep meaning to deal with. If it's on the floor, it's visible, and if it's visible, the desk looks unfinished.
Mount the power strip inside the tray with the velcro ties from step two. Run one single cable from the tray down to the wall outlet. One cable. Not six.
Why this one: The Signum is $25 and has been the standard for a decade. The Vivo Under-Desk Cable Management Tray ($30) is slightly wider and works if you have a thicker desk. Don't overthink this.
If your desk is glass or has a thin top: Skip the tray and use a cable management box on the floor instead. Same principle, less elegant.
Two: A Roll of Velcro Ties
VELCRO Brand One-Wrap Ties, $10 for 25.
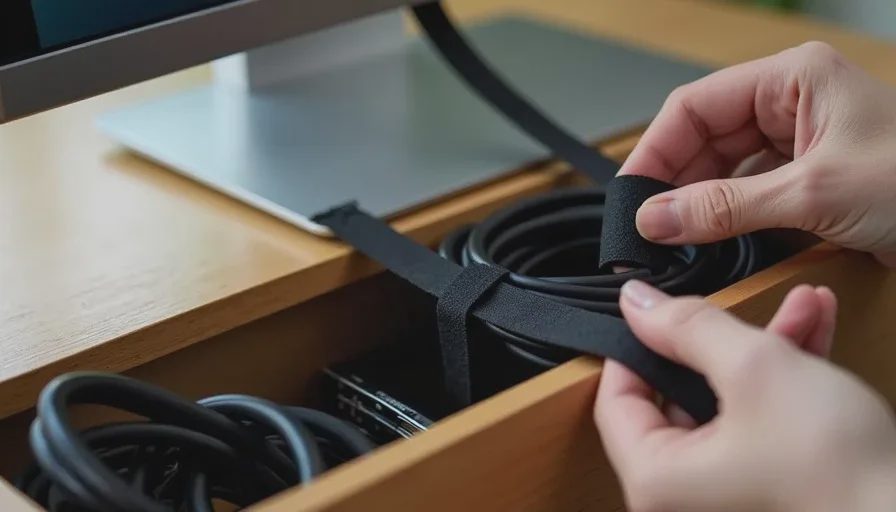
Not zip ties. Zip ties are permanent, and the moment you need to swap a cable—which will be next month—you'll have to cut them and start over. Velcro ties are reusable, adjustable, and take two seconds to open.
Use them for three things:
Bundling cables that run together. The monitor's power cable and display cable should be one bundle, not two loose lines.
Securing the power strip inside the tray. It should not slide around.
Wrapping cables in storage. Every cable in your drawer should be wrapped and tied. This is how you stop owning twelve mystery cables.
Why this one: The generic brand works fine. Get the 8-inch ones for cables and the 12-inch ones for larger bundles. Buy 50, not 25. You will use them.
Three: A Cable Sleeve for the Long Run
Alex Tech Braided Cable Sleeve, $12 for 10 feet.
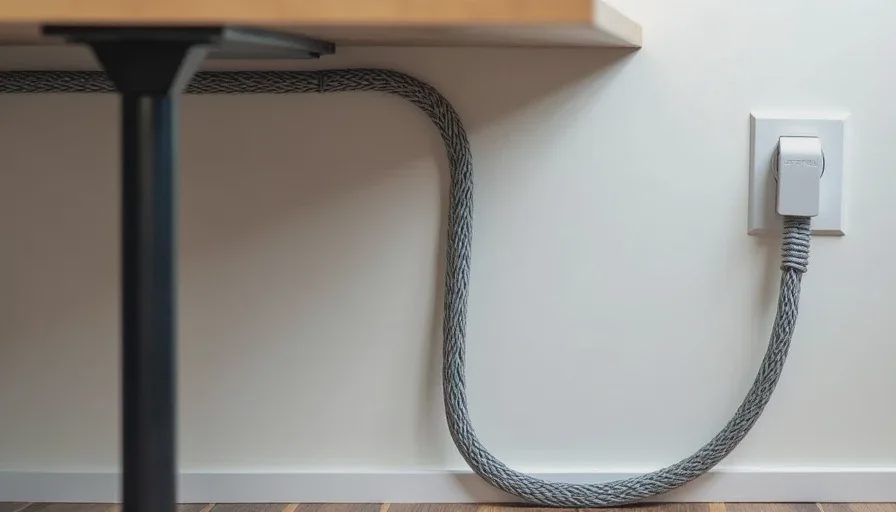
This is the one that changes how the desk looks from across the room. A sleeve wraps multiple cables into a single clean line.
The most common place to use it: the run from your desk down to the floor, or from your desk to the wall outlet. That's the run that's most visible, and that's the run that looks worst without a sleeve.
You'll need to unplug everything to thread the cables through, so do this once, properly, and leave it alone. Get the 1/2-inch diameter for two to three cables, the 3/4-inch for four or more.
Why this one: Braided sleeves look better than the cheap corrugated plastic ones and don't crack over time. The CableMod sleeves are nicer but three times the price. Skip them unless you're building a showpiece.
Four: Adhesive Cable Clips
OHill Cable Clips, $8 for 20.
These are the small ones. They stick to the underside of the desk or the back edge and hold individual cables exactly where you want them.
Use them for:
The laptop charging cable, so it doesn't fall behind the desk when you unplug.
The monitor's cables, so they run straight back instead of drooping.
Any cable that moves regularly, so it stays where you put it.
The trick: clean the surface with alcohol before sticking them. On a dusty desk, the adhesive fails in a week. On a clean one, it lasts years.
Why this one: Any brand works. Get the silicone ones, not the hard plastic ones. Silicone grips better and doesn't crack.
What not to use: The metal screw-in clips. They require drilling, they're ugly, and the adhesive ones work fine.
Five: A Cable Box or Raceway
D-Line Cable Raceway, $15 for 6 feet.
This is for the cable that runs from your desk to the wall. If you can't hide it behind furniture, you run it through a raceway—a plastic channel that sticks to the wall or the baseboard and hides the cable completely.
Paint it to match your wall, and it disappears. It takes twenty minutes to install and it's the difference between "there's a cable running across my floor" and "there isn't."
If your desk is against a wall and the outlet is right behind it, you might not need this. If the outlet is across the room, or you're in a rental where you can't run cables through the wall, this is the solution.
Why this one: D-Line is the standard. The command-style adhesive raceways are easier to remove but don't hold as well. If you're renting, get the removable ones.
Alternative: If the outlet is directly under the desk and the cable run is short, use a cable management box ($20) on the floor instead. It's a box that hides the power strip and the excess cable. Less elegant than a tray, but easier in a rental.
The Order to Do This In
If you're doing all five, do them in this order:
Clear everything off the desk. Unplug every cable. Look at what you actually have.
Throw away cables you don't use. This is not optional. You cannot organize twelve cables you don't need.
Mount the tray and the power strip. Velcro ties. One cable down to the wall.
Bundle and sleeve the run to the floor.
Clip the moving cables into place.
Install the raceway if you still see a cable.
The whole thing takes 45 minutes if you do it once. It takes three hours if you do it in pieces over a month, which is what most people do, and which is why most desks still look like a mess.
What I Don't Recommend
Zip ties. Reusable only. Velcro, always.
Cable boxes on the desktop. They just move the mess from one visible place to another visible place.
Adhesive clips on a painted wall. They take the paint off when they fail. Use them on the desk, not the wall.
Spiral wrap. It looks cheap, it's hard to adjust, and it doesn't hold cables as well as a sleeve.
Buying a "cable management kit" from Amazon. It's usually a box of things you don't need at a markup. Buy the five items individually.
Doing this before you know your final setup. Cable management is the last step, not the first. If you're still swapping monitors, wait.
No letters yet — be the first guest to write.